Connect a device to Iottly
Preconditions
You need to create a new project, prior to connecting devices to it.
Details of connecting a device to Iottly
There are three alternative ways of connecting a device to iottly
- by hand, following the steps presented in the DEVICE CONFIGURATION panel, once you click on ADD DEVICE
- suitable when you want to connect a single device which is already deployed on the field (or to connect a small set of devices, for dev/test purposes)
- this procedure is straightforward, just follow the instructions on the panel and you’ll be done in less than a minute
- by hand, with the help of a script to automate every step
- suitable when you want to repeatedly connect multiple devices already deployed on the field
- place this script on the device
- and follow the usage help of the script on how to use it and how to configure your project
- by pre-installing the iottlyAgent on the image of the device
- suitable for bulk installations in production
- follow this tutorial for the details: pre-install on the device image
Board Attributes
Once the device is installed, the following attributes will be available on the DEVICE CONFIGURATION panel:
- Unique ID:
- this is the unique identifier of the board within Iottly
- it is the username for MQTT authentication
- Board MAC address:
- if the board is reset to factory after having been registered, Iottly will assign the same Unique ID it generated during the first registration, based on the MAC address.
Click on the device to edit the description, or remove it.
Uninstall the agent
To uninstall the agent just remove the dir iottly.com-agent that has been created during the installation.
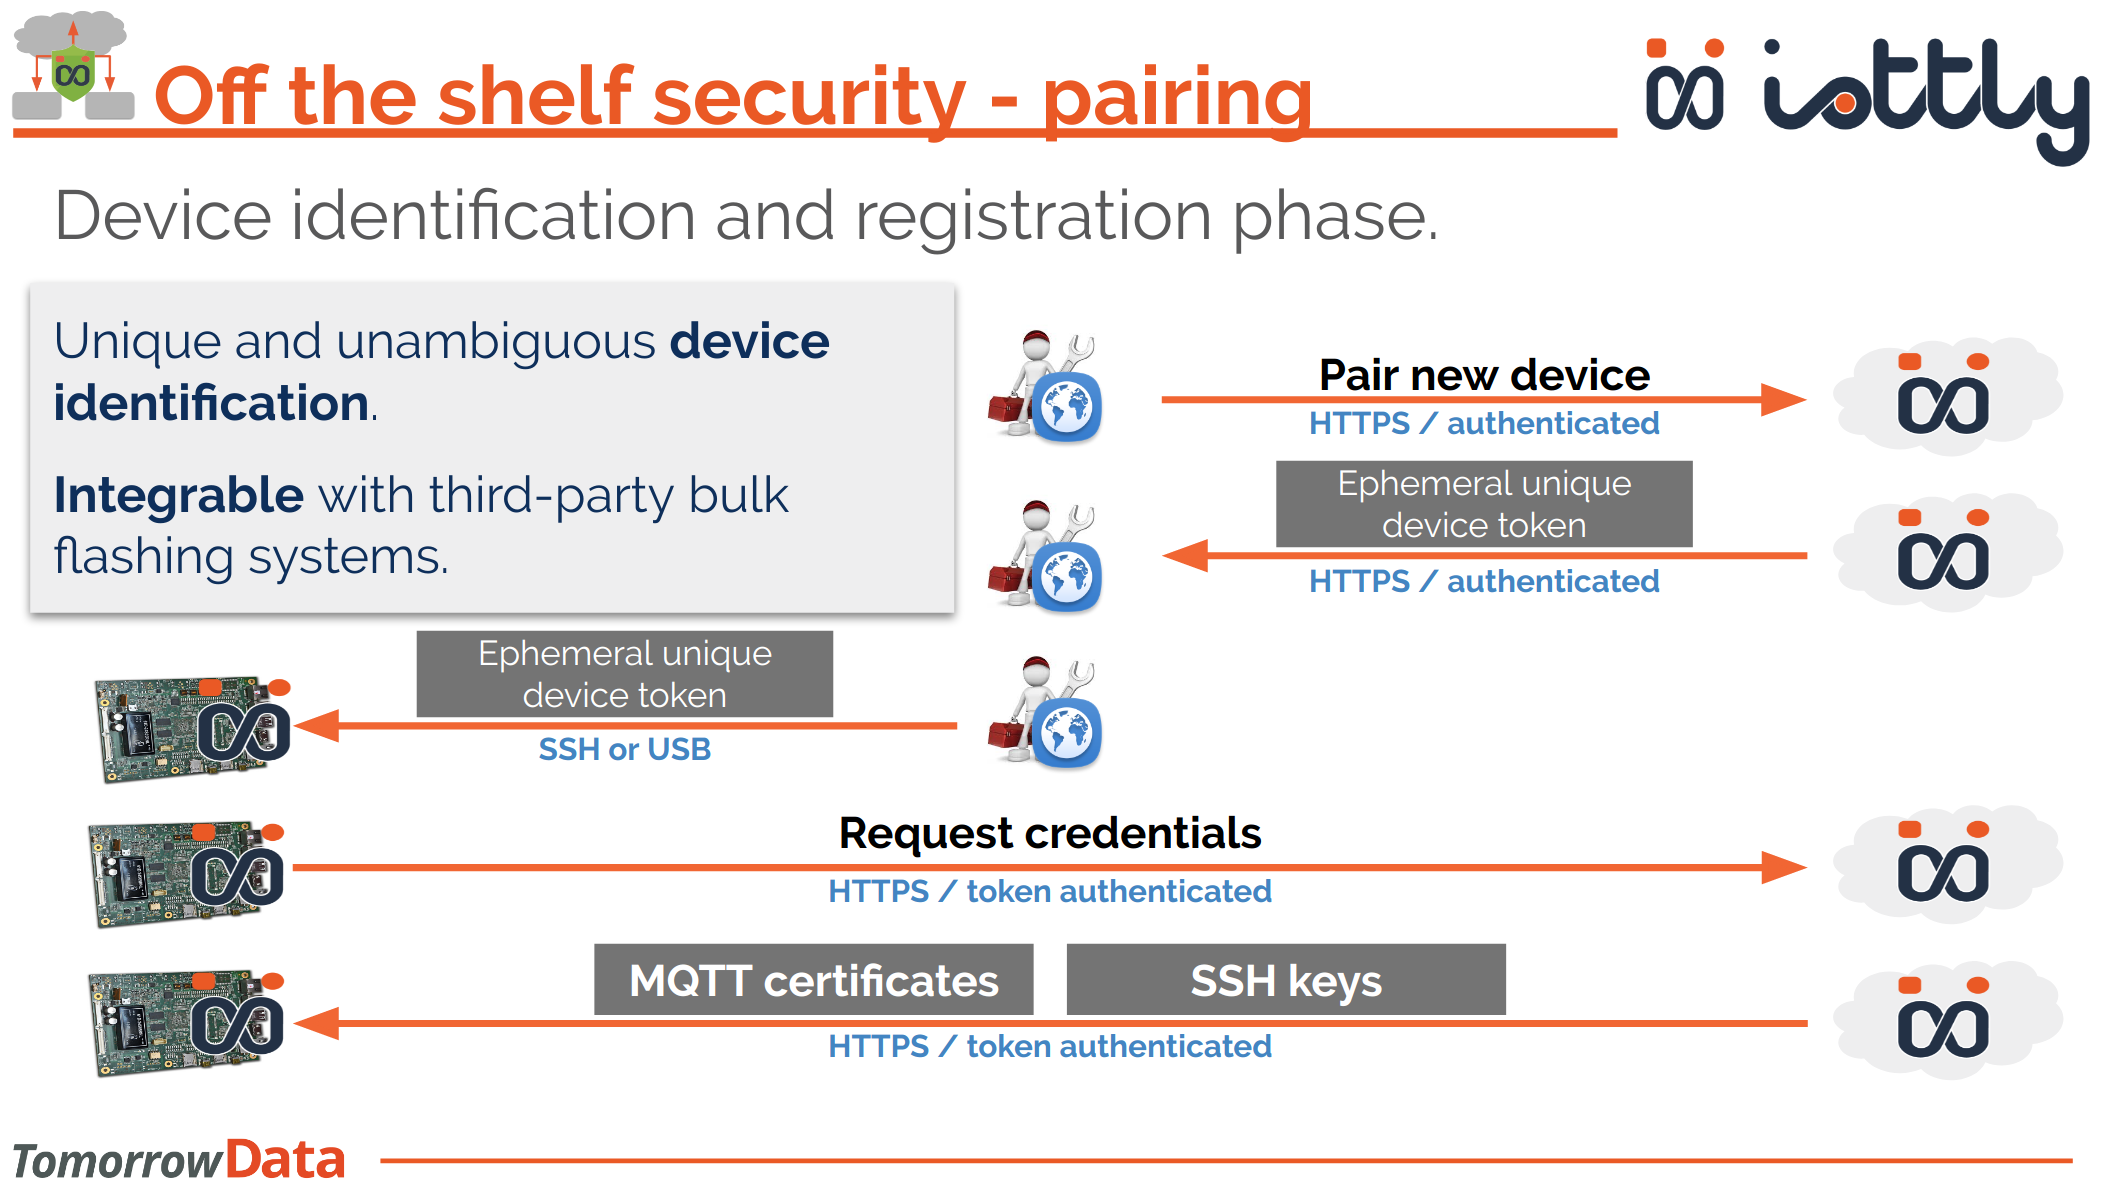
Pairing process
The following diagram shows how the paring process works.
Everything is managed by each of the three above procedures, this picture has the solely purpose of letting you know what is happening under the hood.
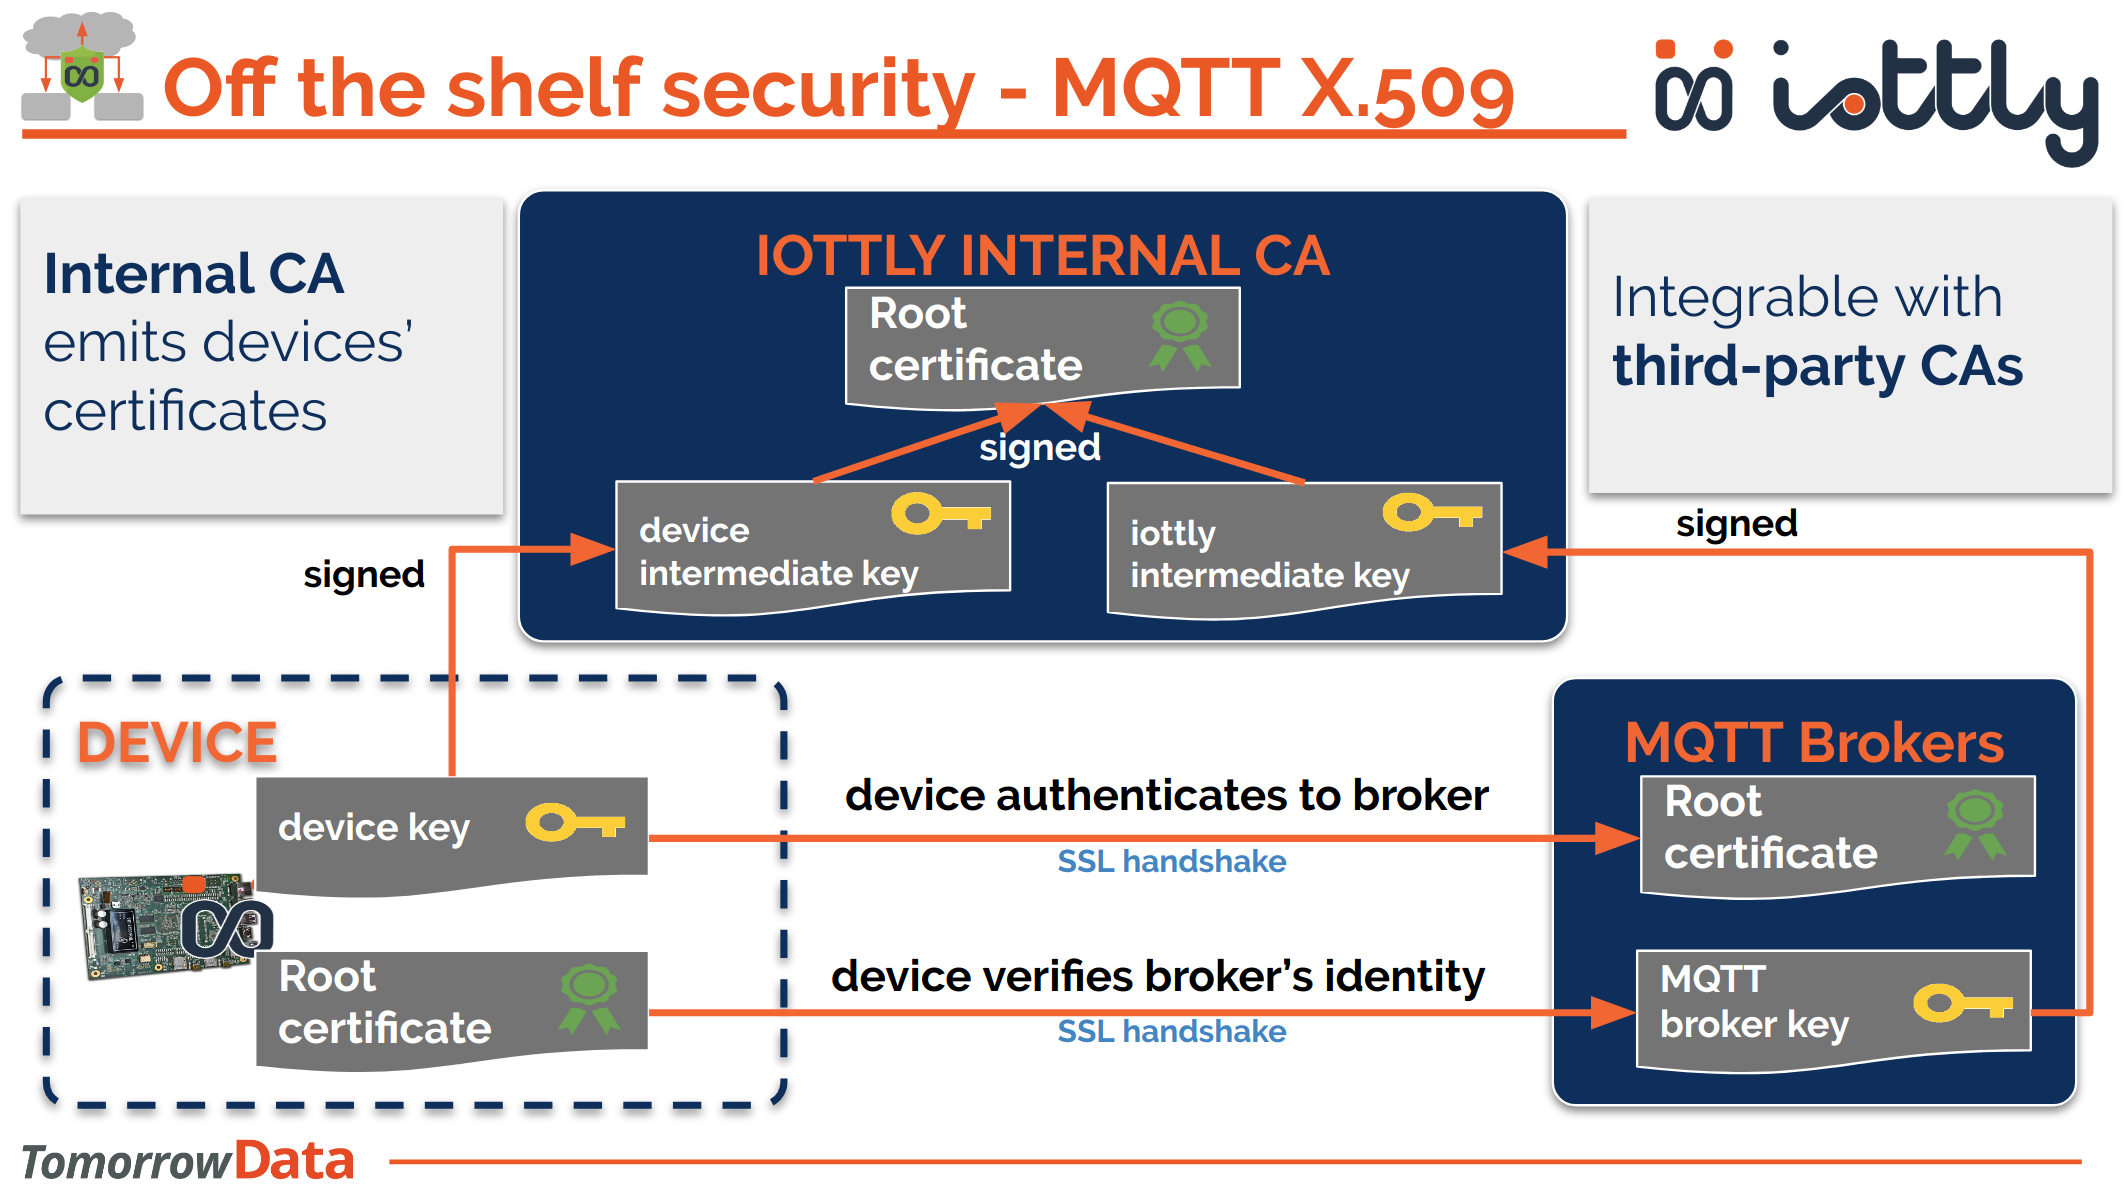
MQTT credentials
iottlyAgent and iottlyCloud authenticate each other by means of X.509 mutual authentication (or client certificate).
Here is how we use an iternal CA to sign both the device Unique ID and the borker username so that each of the two can verify the identity of the other: